I get asked a lot about how to wear a birdcage veil. Most brides want the option of taking off the veil post-ceremony and wearing just the fascinator for the reception. So the simple solution is to make sure the veil is detachable.
But from there, it can get a bit tricky. What sort of birdcage veil do you have? A blusher, a bandeau, a full-on-down-to-the-shoulders-head-cage? (Not a huge fan of those personally. Remind me too much of the dark ages.)
Here are some suggestions on how to wear a few styles of the ever so popular birdcage veil.
 |
| The "Blusher" style veil |
The Blusher
By far the most popular, this veil looks great with many different hairstyles and fascinators and
it's very easy to make! Typically this veil is made with 9 inch wide veiling, gathered up into a "cage" shape. My favorite way to wear this veil is asymmetrically, fastened to the head with comb or bobby pins 3-4 inches above the hairline (place it right where your part is if you part your hair to one side.) It gently sweeps over the eye and gives you a very whimsical, romantic look. You can also scoot it down a bit towards the ear even for a little more drama.
 |
| Another way to wear the "Blusher" style veil |
If you have an updo, pin it in the middle/back of the head right above the 'do for a classic feel. Position your fascinator on top of where the veil is gathered (the middle of the cage.)
 |
| The "Bandeau" style veil |
The Bandeau
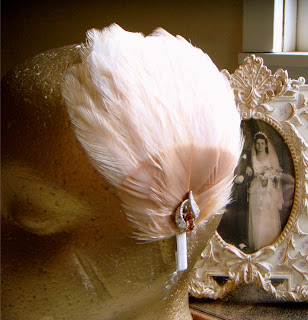
Very simple and chic. Easy to position and detach. This veil typically fastens to the hair right behind the top half of each ear with small combs attached to the veil or just simple bobby pins (my preference.) This veil looks especially fabulous with a hair down look or a half up/half down 'do. I've seen brides put pretty floral clips over where the veil fastens, or a fascinator on one side like this photo.
It lent some nice vintage drama having the feather fascinator on one side of her head where the part was. The veil sort of disappeared into her long curls on the other side. Very soft and pretty.
 |
| The "Teardrop" style veil |
The Teardrop
This one is a little trickier. Because it's smaller and will sit asymmetrically, you have to choose your fascinator wisely. A fascinator with a headband works nicely with this little fella. Position with bobby pins and make sure the fascinator is large enough to "float" atop the veil attractively.
 |
| The "Merry Widow" style veil |
The Merry Widow
Despite the name, this veil is so much fun! It's dramatic and glamorous. Another cage-type veil, with larger diamonds, more shape and a stiffer feel. The veil is typically made with 12 inch "English Veiling" but keeps with the basic design of a
classic birdcage pattern. I like this veil as more of a straight on "cage" for the noggin. Position the gather at the crown of the head with a comb and let it wrap around. Use bobby pins to secure and style it to your liking. A big lovely floral fascinator looks fabulous right on top of an updo or half-updo. I would love to make this veil sometime in hot pink or aqua. This veil is definitely not for the wallflowers!
To Comb or Not to Comb...
I find that a veil with a comb attached is great for updo's, and then using bobby pins to further style the veil works great. If you are wearing your hair down or your fascinator has a comb attached, you might consider ordering the veil without a comb attached. Bobby pins will do the job just as good.
One Last Tip!
For any hairstyle other than an updo, make the comb extra secure using this little trick: comb it to a pin curl. Take a lock of hair and curl it up into a "circle" and pin it to your head using bobby pins to make an "x". Then slide the comb in against the scalp behind the x. Your comb will stay extra secure!
Find my easy to follow
PDF pattern here and make your own unique, beautiful and timeless veil!
Hope this helps make this part of the wedding planning process that much easier for you!

