Showing posts with label DIY projects. Show all posts

11.29.2011

Snowy Winter Terrarium

Who doesn't love picking through the bins at Goodwill?  Okay, so it's not for everyone, but I LOVE when I score a vintage treasure that only costs me 99 cents.  I've been using this little deer in my craft show display and for some Etsy listing flair, but I knew he needed a permanent holiday home.

Last week I bought a few magazines and in one of them (can't remember which... Better Homes and Gardens, maybe?)  I saw a little terrarium inside a fish bowl and thought "I can make that!"  My mind immediately went to glitter and something critter-related.

And so the deer now has a frosty winter abode.


Ahhh... nice and cozy.
I gathered these items together:
  • A clean fishbowl
  • A mini bottle brush wreath
  • A couple mini bottle brush trees
  • Some twigs from the craft store
  • Fake glittery snow
  • A little vintage spray of presents
  • My precious little baby deer
The process couldn't be simpler.  Fill the fishbowl with a bit of fake snow.  Not too much, or the miniatures might be swallowed up!  I filled mine in such a way to create a slope - more snow towards the back, less in the front.


Then I gathered the presents, bottle brush trees and deer and "artfully arranged" with the help of my 5 year old (she has a great eye.) ;)  One useful tip might be to stick the deer's hooves into a tiny piece of styrofoam or glue them to a little scrap of cardboard so that he stands up a little straighter and doesn't go all wobbly.  It will save you many hissing breaths when your kids/cats/dogs/husbands bump the dresser the terrarium sits upon and the deer topples...


Lastly, I hung the wreath in the bare twig tree and placed it right near the deer.  Again, a bit of styrofoam might help things stand a little straighter in high traffic areas.


That's it!  We placed it inside a little twig basket in our Winter Woodland display for some extra woodsiness.  I'm pretty happy with how it turned out.

Some more ideas might be...
Make tiny branch "logs" out of twigs
Mushrooms
Birds in the twig tree (you can find teeny tiny little birds in the floral section of craft stores)
Find all kinds of mini critters on Etsy by searching in either the Vintage or Supplies sections
Put a little Putz style house inside
Add mini LED battery powered lights
Use a big mason jar instead of a fish bowl


Kids LOVE to help with this kind of stuff and it's a fun project they can rearrange over and over to create new scenes.  As long as you don't mind cleaning up wayward snow flurries from time to time.  ;)


UndertheTableandDreaming


http://www.wherewomencreate.com/?p=6374

11.18.2011

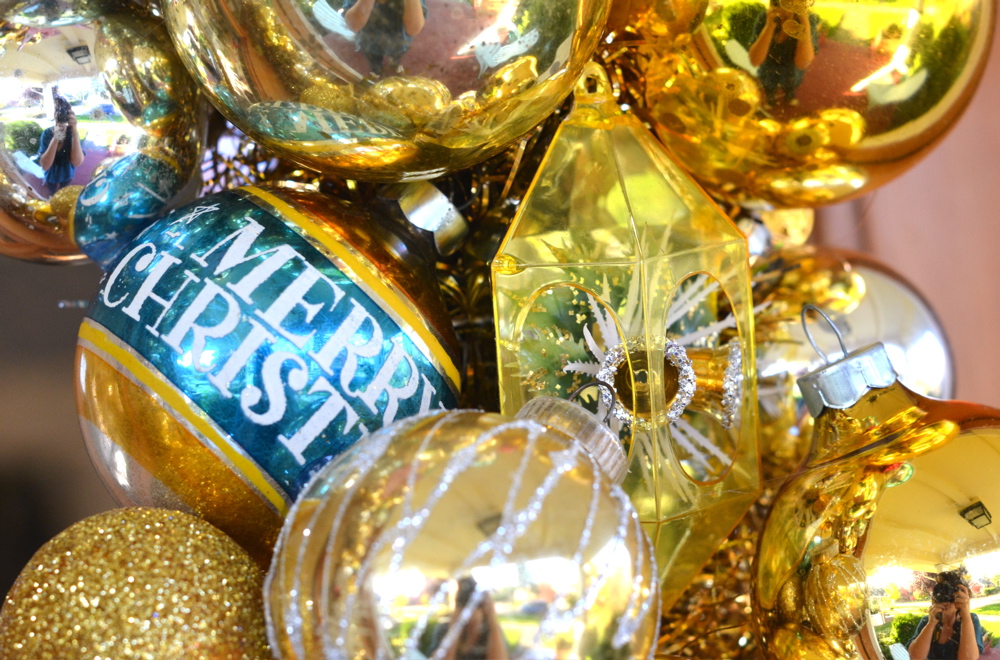
A very merry DIY vintage wreath


I kept seeing these online and thought "I can make that."  Like any craft project, this ornament wreath was a lot more work than I anticipated, but I learned how I could probably speed the process along for the next wreath.


First I started with a large wire wreath form and simply wrapped it in vintage gold tinsel garland. Then I began placing and gluing the glass ornaments with hot glue.  Some took a while to set and not every ornament stuck.  My suggestion is to move fast, use enough glue and be sure where you want to place each piece!


Next time I would start out by lining the outside and inside of the wreath with ornaments first to make it look more uniform.  You could even do a pattern with different colors or shapes.  Then I would fill in the middle and build from there, filling in the nooks and crannies last...

I see me...
It took about twice as many ornaments as I thought it would.  Thank goodness you can find these by the bag for a few dollars at the thrift store.  I'm becoming the Goodwill's best customer this holiday season!


This project is super easy and lots of fun.  Hang it over a mirror or a door.  It would be a great project to work on with an older child or a cautious and careful little one.  Happy Holidays!

9.30.2011

Big Top Love Mini Banner DIY Project

Those little chipboard flags had been sitting around in my craft drawer forever.  They would cry out to me every time I rooted around in there for something.  My kids have been home because of the teacher strike, and we had decided on craft time to keep busy for a couple hours.  They painted magical deer habitats and created 3-D drawings.  I made this.

Big Top Love Mini Banner

You'll Need:

4 Chipboard flags
2 coordinating shades of acrylic paint (I used a metallic pearl finish paint)
Black glossy acrylic paint
3 small foam paintbrushes
Brown stamp ink pad
Scrap of textured fabric (I used a scrap of courdory.  Flannel works good too!)
Hot glue
Yard of coordinating ribbon
Small letter stencils

Paint the flags with a few coats of paint - two green, two pink.  For a more finished look, paint the backs as well.  Acrylic craft paint dries pretty fast, thank goodness!  Let dry.


Bunch up your fabric scrap and press into the ink pad a few times.  Gently rub and blot ink around the flag.  Rub onto the edges and corners to give it an antiqued finish.  Let dry.

Use stencils to paint a letter from the word LOVE onto each flag (L&V one color, O&E another) by dabbing with black paint.  Be careful not to overload the brush or the letters will look muddled!  Blot before painting. 

Using the alternate color, carefully dab little bits of paint with the corner of the foam brush.  Again, be sure not to overload the brush - blot it before dabbing onto the flags.  The goal here is for it to look like flecks of paint, chips, scrapes.  Let dry.


Heat up a glue gun and glue letters to a length of ribbon leaving about 2 inches between letters.  Make a line of glue on the front of the letters and press the back of the ribbon into the glue - it's hot and bonds quickly, so make sure you're careful!


If you like, you can antique the ribbon with the stamp ink using the same method as for the flags.  Trim to desired length and hang!


Use whatever colors/words you like.  Hang with twine instead of ribbon!  Add glitter if you're feeling nutty.  Have fun!

9.19.2011

New DIY Project Preview

I've been busy!  The house is covered in glitter now thanks to this week's DIY project spree.  And no, glittering the house was not my DIY.  (But there's a thought...)

Here are three projects you'll see here on the blog over the next few weeks.  Each will have step by step instructions and suggestions for how you might make changes/improvements to your liking.  Be sure to check back!

Big Top Love Chipboard Mini Banner

Crafty Yarn Wrapped Wreath

Glittered and Upgraded Figurine
Our school district is dealing with a strike right now (sigh.  Keep fingers crossed they sort it out soon!) My kids are home with me, which means I work at about a 50% capacity.  But I will do my best to get at least one of these suckers edited and posted for your crafty enjoyment before week's end!  Do you have a preference???